Open topic with navigation
You are here: Automate Tasks > Tutorials > Automate Complex Excel Reports
Automate Complex Excel® Reports
Multiple Result Sets on a Single Worksheet
You may need to create an Excel report that contains multiple result sets on a single worksheet. You can do this by exporting result sets to a specific cell in a worksheet. You may also want to make this report attractive. You can do this by using an already-formatted Excel file as a template. In this way, you can use an Excel file that you previously formatted with titles, heading, etc, as a template, and then export data to this file each week, producing an attractive, easy-to-read report, automatically!
In this example, we will use two different queries to export data to two different cells on a single worksheet.
Create Excel File Template
- To start, create an Excel file to use as a template. (Use an Excel file, not an Excel template.)
-
Format the Excel file to your preferences. For this example, we added a page title and two section headings on one worksheet. You will export data to a range of cells in each section. Make a note of the first cell address in each range where you want your data to start.
- Name the worksheet so you can easily select it from a list later.
Create Automation Script
- Open a new Automation window.
- Your script's first task will be to make a copy of the Excel file template so you can use this copy as your new file. Click the Copy File activity to add it to the Automation design window.
- With the Copy File activity selected, click in the Source file field, then browse to and select your Excel file template.
- In the Copy to folder field, select a location to place the copy of the Excel file template.
- In the Copy name field, enter a name for your new Excel file.
- Do not specify a suffix for the copy file.
- Click to save and run your script. This will create the copy file.
-
Now click the Select to File activity to add it to the Automation design window. Make sure the activity is added to the Automation workflow below the Copy File activity.
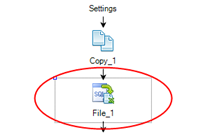
- In the Select to File activity's Activity Input tab, select a database connection or use the default.
- Then select a SQL file that contains the first SQL statement (or enter the first SQL statement).
- After inputting the SQL statement, click in the Name field, and select the copy file that you created when you previously ran the script.
- Deselect Overwrite and do not add a suffix.
- Click Advanced Properties. The Advanced Export Properties dialog opens.
- In the Worksheet name field, enter the name of the worksheet into which you want to export data (or select the worksheet name from the list).
- Do not select to clear the worksheet.
-
In the Options section, in the Start export at fields, specify the column and row address of the first cell in the range into which you want to export this data. Click OK to close the dialog.
- Now add another Select to File activity below the first one in the Automation script workflow. You will use this Select to File to add the second result set to your worksheet.
- In the second Select to File activity, select or enter the second SQL statement.
- Click in the Name field and select the same copy file again.
- Deselect Overwrite and do not add a suffix.
- Now click Advanced Properties and select the same worksheet.
- In the Options section, in the Start export at fields, specify the column and row address of the first cell in the range of cells into which you want to export the second result set. Click OK to close the dialog.
-
Click to save and run your script.
-
Open the new file by clicking the link in the Log tab. The file retains the formatting and headings from your original template and includes the result sets of the two queries inserted into the cell ranges you specified.
The output of this script is a formatted excel file containing the result sets of multiple queries on a single worksheet.
Note: If you want to create a script that exports the result set of each query into a separate worksheet in your Excel file, you can easily accomplish this by using a SQL file that contains multiple queries. See Automate Exporting to Excel® Reports for more information.
Schedule A Script
See Schedule Your Script to learn how to schedule the Automation script.
Related Topics
Getting Started with Automation